- 2024.04.28 09:58
Throughout this guide, we will see how to reinstall your Windows VPS directly from your VPS control panel.Â
It will allow you to quickly recover a VPS or even upgrade / change your Windows Version within a few minutes.Â
1) Login to your Windows VPS Control Panel from the link below using the credentials you received during your signing up process.Â
https://mywinvps.host-stage-dns.com
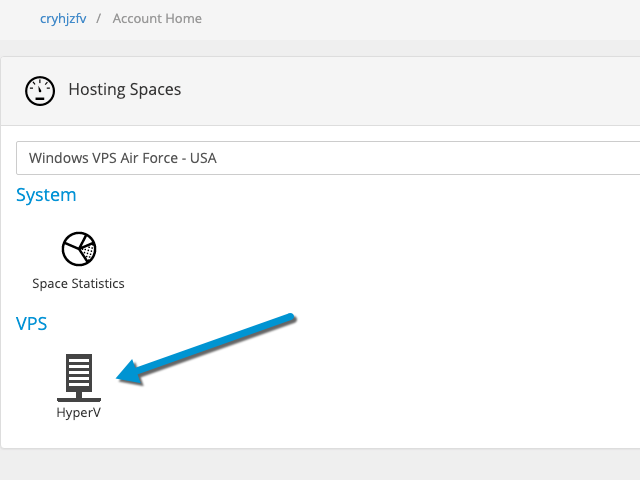
2) Click on HyperV / Virtual Private Servers as shown in the screenshot below

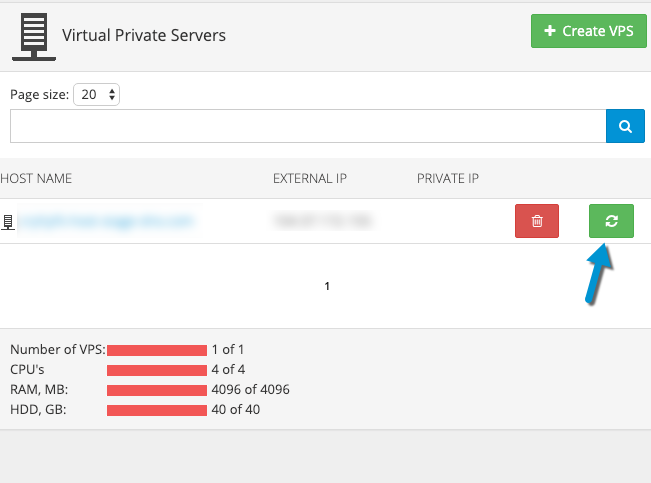
3) You'll get to  your Windows VPS recapitulative page which includes the possibilty to see the IP, delete the VPS but also Reinstall it. You would need to click on the Green Button as pointed in the screenshot below:Â

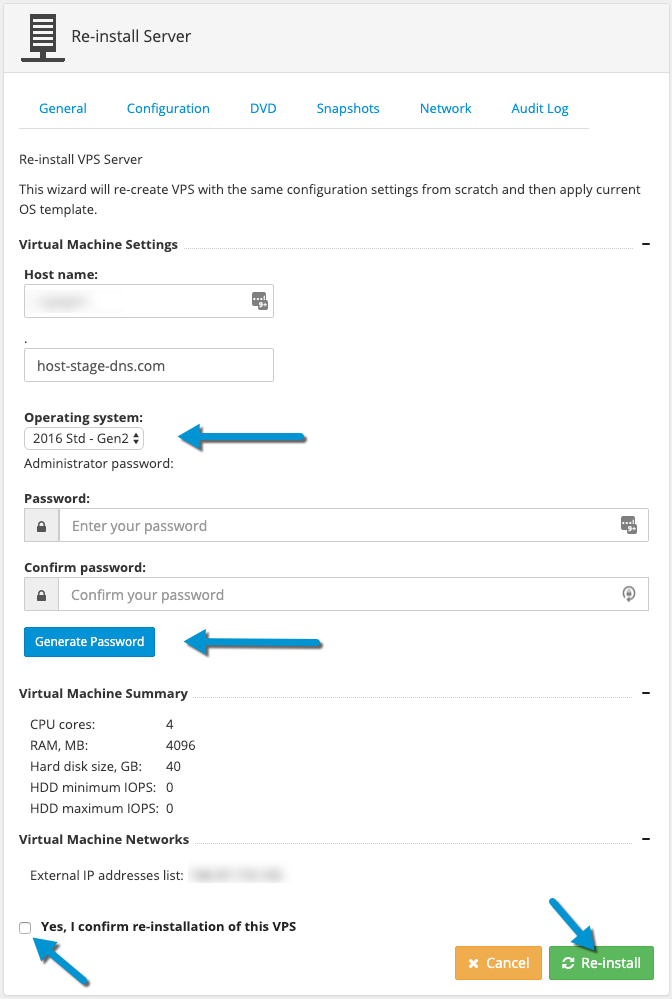
4) You are now to the VPS Reinstallation configuration page from where you can choose respectively the following:Â
- The VPS name - You can choose anyname and you can keep the default one
- OPerating System - You can choose Your Windows OS version from at this day 2008R2, 2012R2, 2016
- Choose your VPS Password - It will be the password required to connect through the remote desktop program and therefore your administrator password
- Tick the confirmation box and click on Reinstall.Â

** NB: The Snapshots wouldn't be deleted during the operation and the reinstallation would remain final, please proceed with care and back up your data prior to reinstalling your Windows VPS.

