- 2024.04.28 09:58
Here is the complete guide to modify your password directly from your Windows VPS control panel.Â
Â
1) Log in to your Windows VPS control panel at the URL below using the details you received upon sign up:Â
Â
Â
2) Click on HyperV
Â
3) Click on your VPS Name
Â
4) You'll now be able to manage your VPS. Click on the Configuration Tab.Â
Â
5) From the Configuration page, Click the "Change" button at the Administrator Password.Â
Â
You'll be able to set the password or generate a secured one and set it by clicking on "Change Administrator Password".Â
Â
That's it! After a 2 minutes delay time for the password to propagate over your VPS, the password is now changed.Â
Â
Â
Â
To change the password directly from the Windows VPS. You may proceed as follows:Â
Â
Â
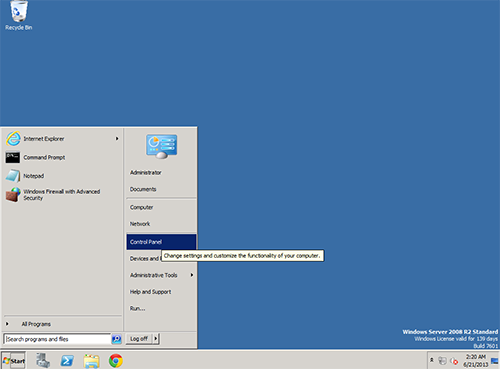
1) When logged to your VPS, click on the start menu and select control panel.
Â
Â
Â
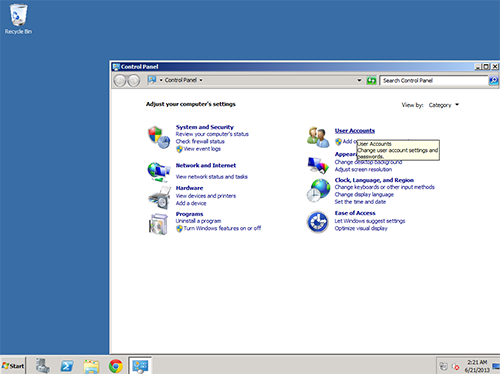
2) Once you are browsing the control panel window, you would need to click on User Accounts.
Â
Â
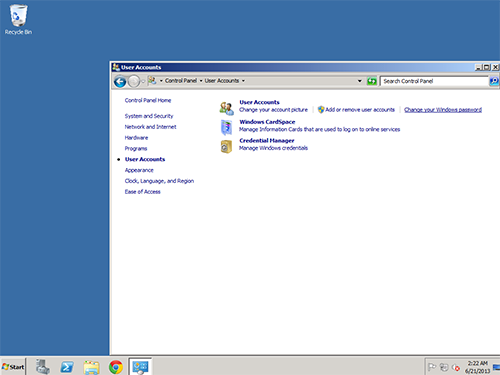
3) At this point, you should see as the screenshot below  and you can now click on "Change Your Windows Password"
Â
Â
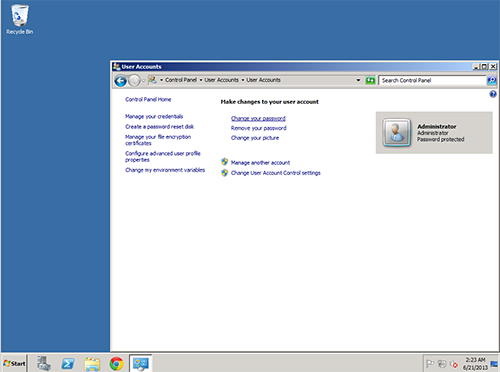
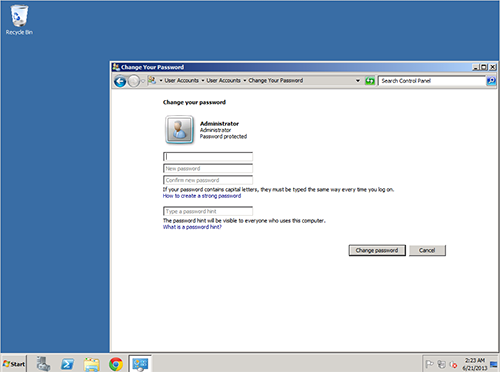
4) You'll be prompted to another screen where you shall select "Change Your Password"
** Do not Remove Your Password which is would constitute a massive security breach **
Â
Â
5) You should be now able to change your windows VPS password in typing it twice. Make sure that NumLock and Caps Lock are set properly. You may as well add a hint to your password which would be displayed in your session manager upon failure.Â
Â
Â
Then, you would need to click on change your password for the change to be activated.Â
That's it! You have now changed you windows VPS password!
Â
Â
Â
