- 2024.04.28 09:58
Throughout this guide, you'll learn how to transfer your files from any Windows computer to your Windows VPS.
While it is more convenient to use a third party service such as Dropbox or Mediafire giving the network speed, drag and drop from your computer directly is also fairly useful.
Please find below the required steps to perform the file transfer from your computer to your VPS hosting:
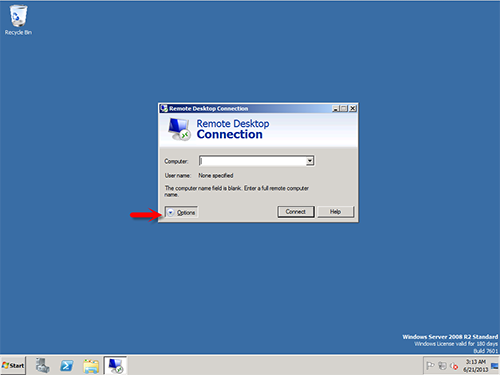
1) You would need to open the remote dekstop connection application just as if you were going to connect to your VPS.
At the RDC window, you'll be able to see the "Option" button and you would need to click to expand a new set of configurations.

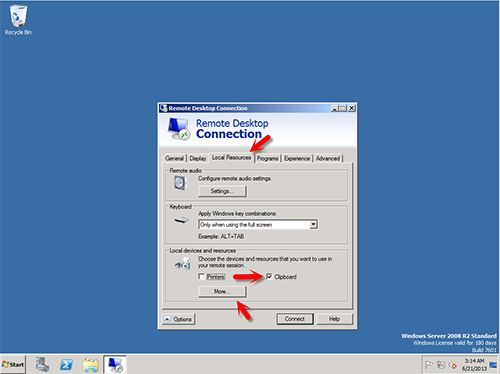
2) Select the Local Ressources tab, as shown below, check the Clipboard box and then click the "More" button to display the options.

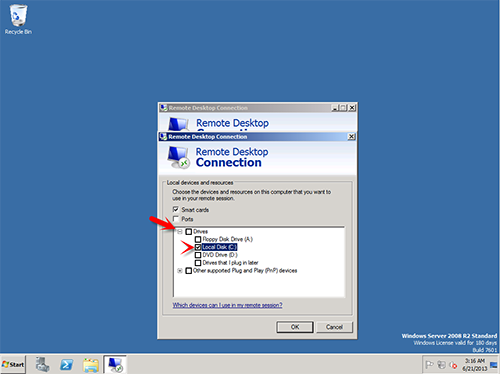
3) A Pop Up should appear and from there, you'll be able to select the hard drives you want to enable within your VPS. It will appear as a networking device within your Windows VPS.

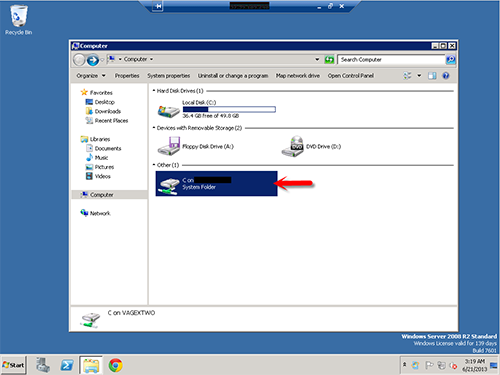
4) That's it! You can presently connect to your Windows VPS and check the Computer windows and see your hard drives on your windows VPS. From there, you'll be able to drag and drop your files to transfer them to or from your Virtual Private Server.


