- 2024.04.28 09:58
Throughout this tutorial, you'll learn how to update your nameservers using the Namecheap website.
Changing nameservers allows you to make your domain point to your web hosting services.
Find all the steps below to perform your nameserver update.
1) First You would need to login to your Namecheap Client interface.Â
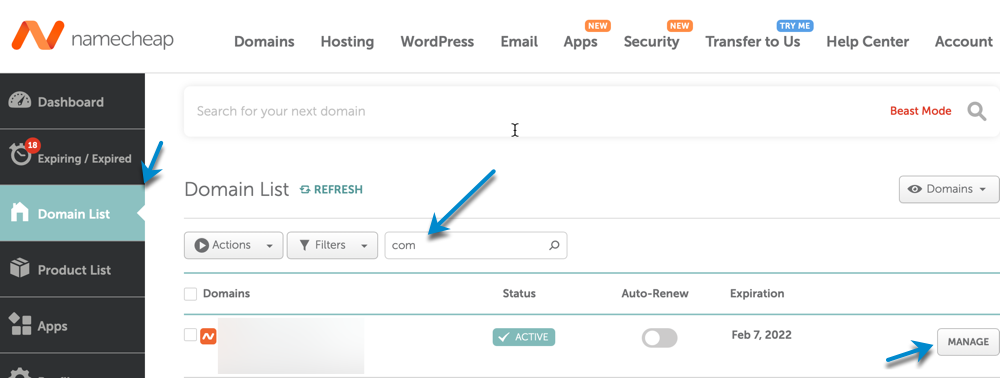
2) Once logged in, you would need to click on "Domain List" and search for your domain Name and click on Manage at the end of the row of the domain you would like to change the nameservers for.Â

3) On the Domain main tab, you would need to look for the "NAMESERVERS" section. Select in the dropdown "Custom DNS" and type the nameservers you would like to set for your domain and click on the Tick to validate the changes as indicated in the screenshot below

That's it you have changed your DNS nameservers. Once, changed, please allow 24 to 48 hours for full DNS propagation so your domain resolves properly to your hosting.Â

