- 2024.04.28 09:58
Throughout this tutorial, we will show you how to configure your VPS and your computer so the sound of your VPS can be heard on your computer.
**Disclaimer** According to your location, you may experience high latency and the sound wouldn't be optimal.
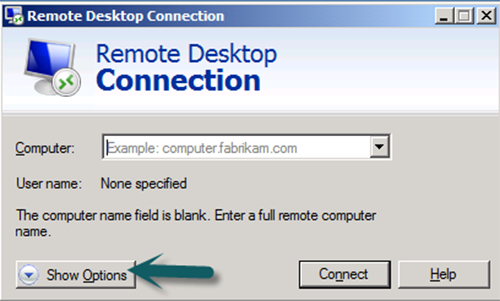
1) You need first to access your remote desktop program to make sure t is properly configured. On the Remote connection program, you have a button named Show Options that you would need to click on.
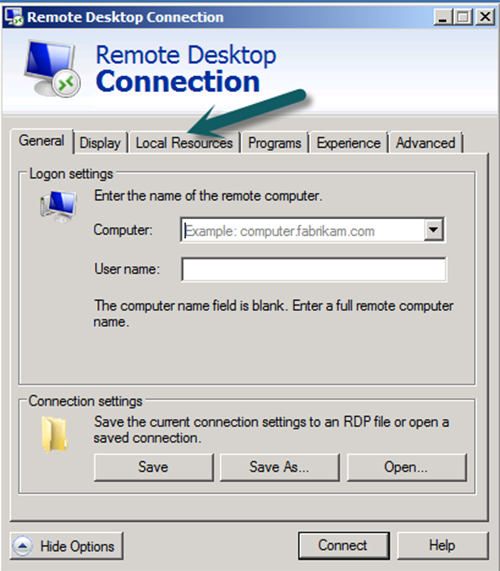
2) Once you have expanded the options, you would need to select the local Ressources tab, as shown below :
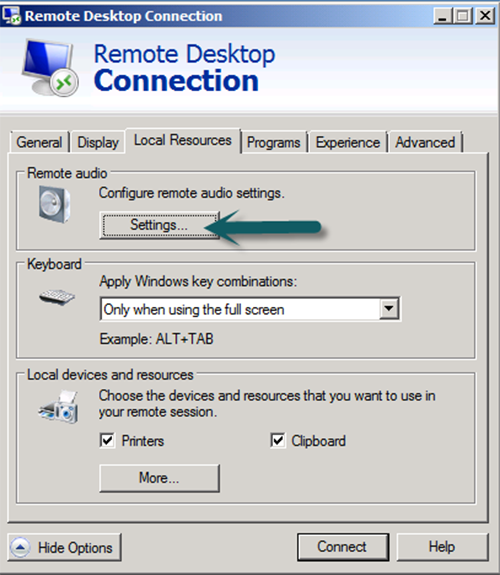
3) In the Remote Audio area, you would need to click on Settings :
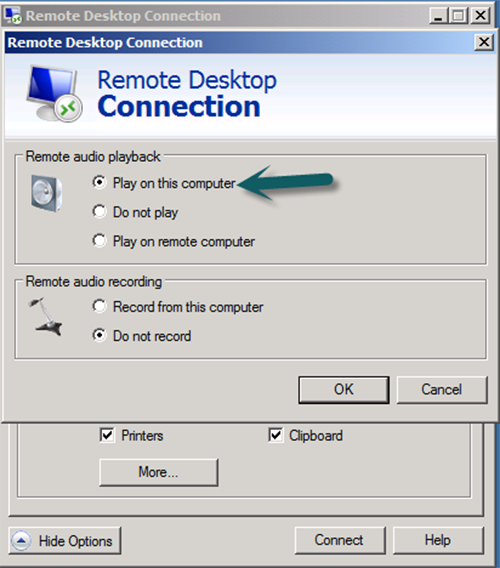
4) Then, you would need to select, Play on This computer and click OK. You can also send a Microphone stream on your Windows VPS by selecting Record from this computer.
5) Now, that you have configured your computer properly, you would need to connect to your VPS, click on the start menu of your VPS and type : tsconfig.msc :
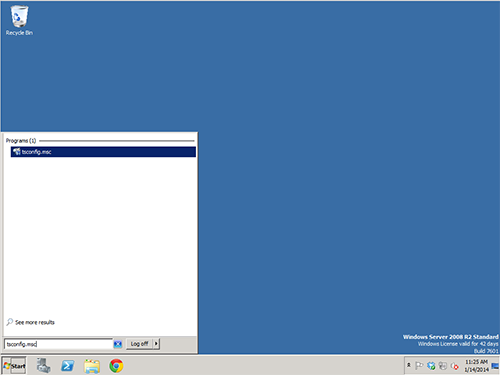
6) You are presently on the Remote Desktop Session Host Configuration, and you would need to double click on your RDP connection in the connections list :
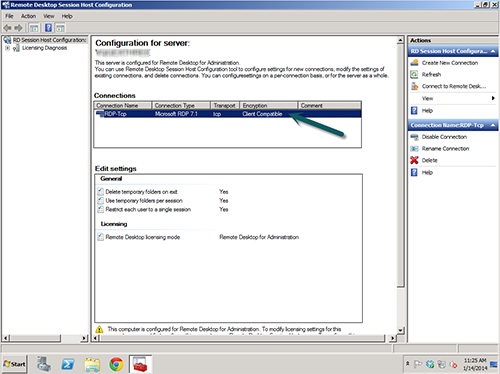
7) A pop up should appear and you would need to click on the client settings tab, untick Audio and video Playback, click on Apply and OK.
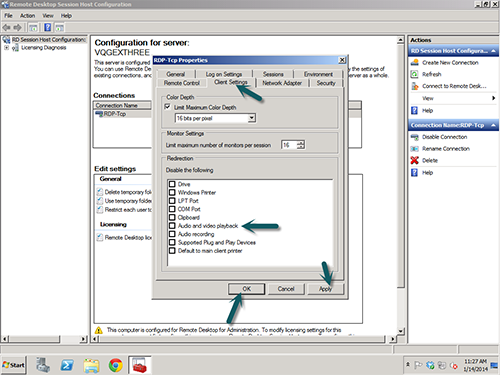
That's it! Now you have successfully configured your audio on both your computer and your windows VPS.

