- 2024.04.28 09:58
In this tutorial we will see how to create a standalone cPanel account from a WHM access.Â
From a Reseller Web hosting offer, a linux VPS along with a cPanel licence and also a dedicated server with cPanel, you have the possibility to isolate your websites from each others by creating multiple cPanel accounts.Â
It is way more convenient to manage as you can enable individual features for each cPanel accounts.Â
Let's get started ! You would need to be logged in your WHM panel from the login details you have received by email.Â
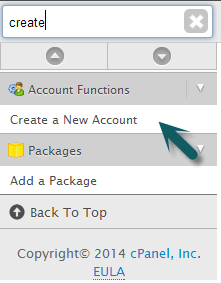
1) Once logged in, you would need to either type create in the WHM's sidebar search field or select the create a New Account in the sidebar under the Account Functions category.Â
You can find the screenshot below :Â
2) You should be prompted to a screen where you can type the account information.Â
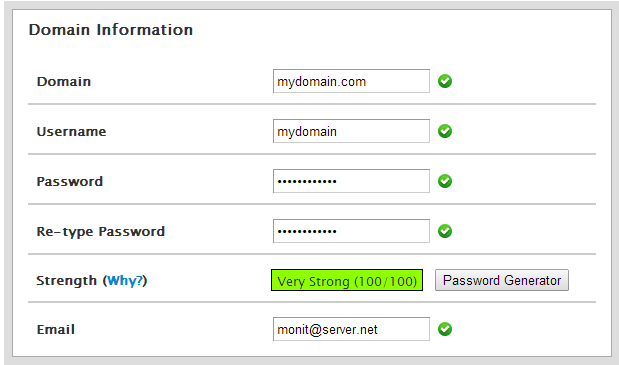
THe first fold includes the domain related information along with the cPanel login information :
a. Domain: it is the domain you want to create a cPanel account for
b. Username: It is the username that will be used upon cPanel login. It will also name the home directory of the account.Â
c. Password: The password which will be used to login  to your account. Please note that it must absolutely be different from your root / reseller password to prevent any authorizations conflicts and security holes.Â
d. Email : It will be the email address linked to the account.Â
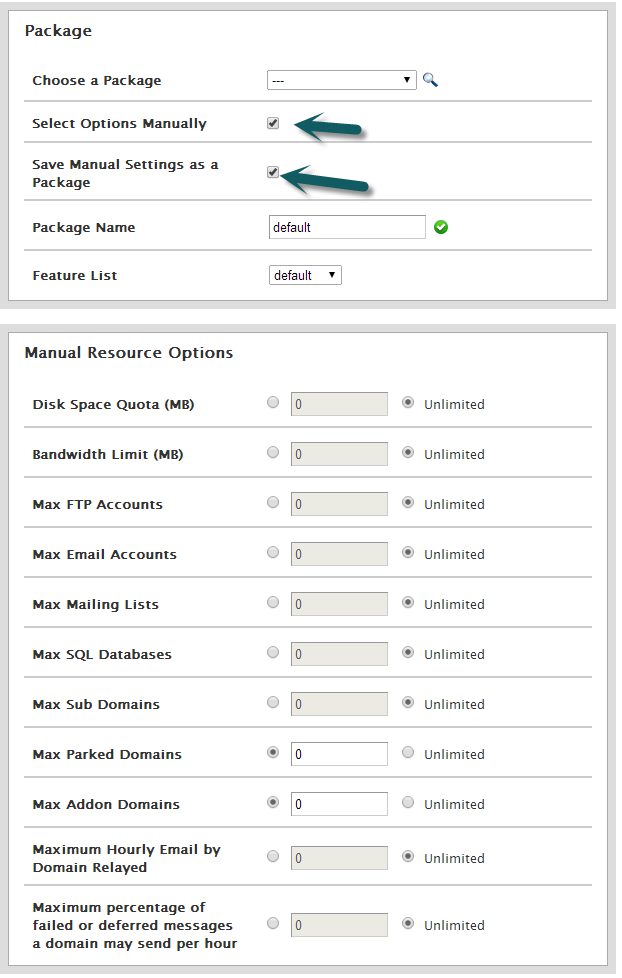
a. If you have already done these steps, you should have a package available in the "Choose a Package dropdown", if not, don't worry we are going to detail. The package will override all the values and will simplify the process.Â
Please note, that all accounts must be attached to a package.Â
b. If it is your first time, or if you want to create another package you can tick both Select Options Manually and Save Manual Settings as a package, which should display a new input box where you can type the package name you'll want to see later.Â
The features list can be defined as default.Â
c. The manual resources Options will define the resources value for your package. All options are fairly explicit but please note that Maximum Hourly Email by Domain Relayed and the Maximum Percentage of failed and Defferred messages are defined upon the root servers settings and will override the value you type.Â
a. Dedicated IP : If you want to allocate a strictly dedicated IP to your account. You'll be able to select the one you want in a dropdown.Â
b. Shell Acces : If you want to create a cPanel account with a SSH access (for resellers a support ticket is required to enabled a jailed access for your account)
c. FrontPage Extensions : You can leave this feature disabled as it is now depreciated and not available on most of our servers.Â
d. CGI Access : Enable the possibility to add CGI scripts to your website
e. cPanel Theme : You can choose the default cPanel layout for your cPanel account
f. Locale : It will define the primary language of your cPanel account.Â
g. If you have a root access, you should also have the possibility to enable the reseller access for your cPanel account which will also have its own WHM access and have the possibility to create its own set of cPanel accounts  (not available on reseller web hosting)
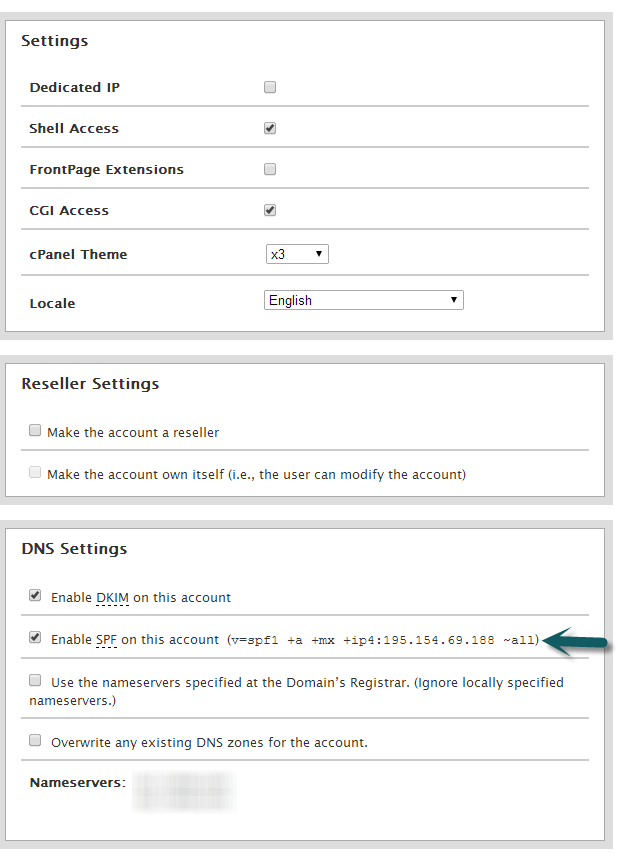
a. Enable DKIM : This settings is used to send emails and should be enable if you have set your nameservers as provided in your welcome email. (it will not work with self managed DNS)
b. Enable SPF : This settings is also used to send emails in order to authorize IPs to send emails on behalf of the domain. (it will not work with self managed DNS)
c. The last part is the DNS settings where you can choose to overwrite the nameservers in spite of the ones specified at the domain registrar level, or use the ones specified at the registrar.Â
If you want to use private nameservers (ns1.yourdomain.com, ns2.yourdomain.com) that aren't the default ones of the server / reseller web hosting account, you would need to select the option 2 (overwrite any existing DNS zones)
If you haven't yet changed your nameservers at your domain registrar, you shall also select option 2Â (overwrite any existing DNS zones) so your domain become instantly available upon DNS propagation.Â
If you are using self managed DNS, or if you already have changed your nameservers, you can select option 1 (Use the nameservers specified at the domain registrar.)
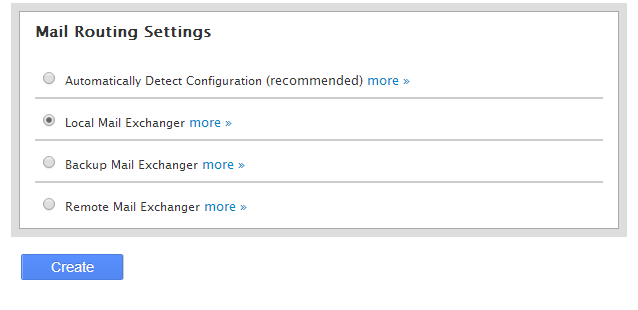
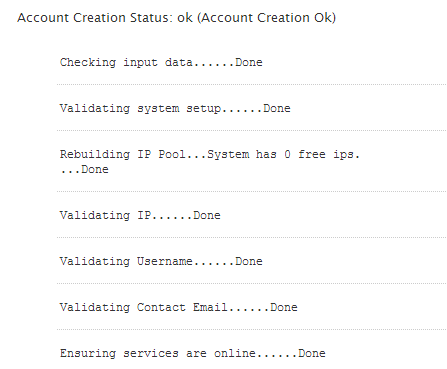
7) Once you have filled up all the settings you are ready and you can hit the Create Account button and your instructions will be processed and it will give you a summary of your freshly created web hosting account.Â
